hold.that.thought. Blog
How to Turn a 2D Sketch into a 3D Printed Part in 3 Easy Steps
Do you have a concept sketch that you want to turn into a 3D Printed part? Read this guide to learn how to turn a simple 2D sketch, drawing, or image file into a 3D Printed part.
Learn how to turn your simple sketches into 3D Model files and 3D Printed parts.
If you can make a simple drawing, then you can make a 3D Printed part.
Getting from your sketch to a final 3D Printed part requires just one step in between: creating a 3D Model in STL file format. See this blog post to learn a little more about what 3D Model is, and why you need one in order to start 3D Printing.
This guide will walk you through how to transform your 2D sketch into a 3D Model file in STL format, and then how to use the Hollywood 3D Printing instant 3D Printing quoting tools to order your 3D Prints online.
Step 1: Make your Sketch with Dimensions
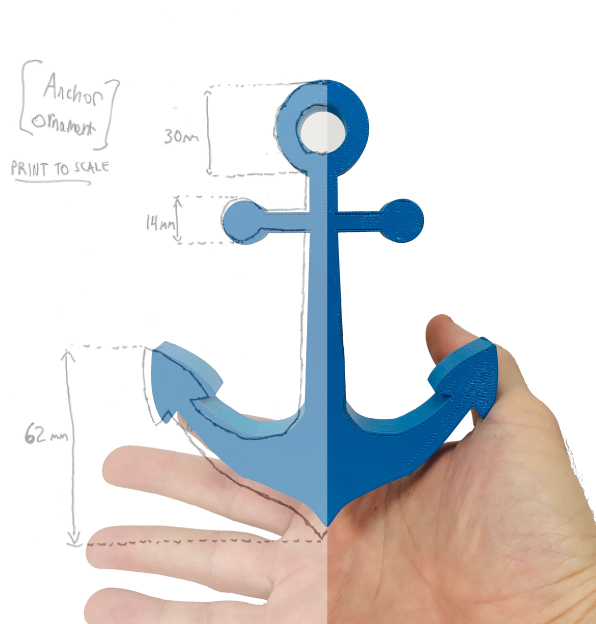
In this guide, we'll focus on turning this simple 2D outline of an anchor into a 3D Printed part. This shape outline will be copied 1-to-1 in a 3D CAD program, and then assigned a thickness to turn it into a three-dimensional model.
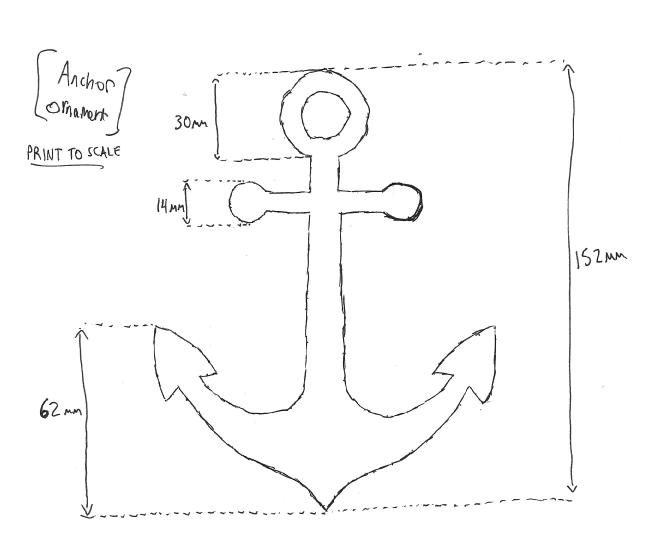
Your drawing should have a basic outline of your part, with any important dimensions included.
While this is a relatively basic task compared to the complex design geometry that 3D Printing is able to reproduce, it's nevertheless a
foundational concept in 3D Design. Understanding how to turn a simple sketch outline into a 3D Model is the first step towards creating more detailed 3D shapes.
There are two things you want to make sure you have here: a sketch trace, and any dimensions that are important to your final part.
Sketch Trace: This is the outline of the part you'll be creating. This can be drawn free-hand; lines don't have to be perfectly straight, and you don't need to be good at drawing circles. Luckily, the design tools covered in the next step of this article will
take care of this perfection for you.
Dimensions: Define the overall size of the item you'll be creating. For a 2D shape, this can be only one dimension such as the overall height or width -- but if you have other areas where hole sizes or widths are important, you can call these out as well. For this anchor piece, we'll
be focusing on only the overall height dimension to start. Then, when we're done creating our 3D Model, we can use a software measurement tool to check against the other dimensions written on the sketch.
Once you have your sketch ready, just take a picture of it -- or scan it to an image file -- and then you're ready to start creating your 3D Model design.
Step 2: Creating a 3D Model from Your Sketch
If you're new to the world of 3D Design software, creating a 3D Model from scratch may sound like a daunting task. While it's true that the 3D Design process can be a very in-depth process requiring skill and experience, you'll see here that the process of creating a 3D Model
from a simple 2D sketch is quite simple.
The first thing you'll need is a 3D Design program. We recommend Autodesk Fusion 360 because it's free to start and easy for beginners, but it is also an incredibly powerful platform that will allow you to create just about anything you can imagine as you become more experienced in using the software.
While it might be more comfortable to use a more basic lighweight design tool, you'll thank yourself later for starting out with Fusion 360. Let's jump right in!
Draw a line defining your object height: When you launch Fusion 360, you'll have a new design open and ready. Press the "L" key to draw a line. This will first prompt you to select a sketch plane, so click any of the three options. We'll use the horizontal plane for a nice top-down view. Click anywhere to place your first point, and then as you go to place your second point, you'll see a text box appear.
Type your height dimension into this box, and hit Enter to draw the line.
Congratulations! Now you have a line that matches the height of the anchor in the drawing. When you add your sketch image in the next step, you'll have a visual aid to help you scale the image to match this height dimension.
Import your sketch image: While still in Sketch mode, click Insert -> Canvas from the top tool menu, and select the image from your computer.
This will import your sketch into your CAD software, and then you can use the placement and sizing tools to get your image to be the same height as the height line you drew in the previous step.
When you've got your trace lined up with your height line, click OK to exit the canvas import menu. Now you're ready to trace over your sketch and create a flat profile of your shape in this 3D CAD software.
Trace the image: To trace this image, we'll use the Circle tool, Line tool, and Fit-Point Spline tool. We start off with the Circle tool, and place the center points in the middle of the round areas, and draw the circles out until they overlap with the drawing.
Use the line tool to trace over the straight areas of the drawing, and the Fit-Point Spline tool to place points along the areas of the drawing which have curvature. The Fit-Point Spline tool will create a curve which traces along the points you place one-by-one.
Since this is an object with symmetry along the vertical axis, meaning that it looks the same on the left half as it does on the right half, then we can save ourselves some time by mirroring the sketch across a vertical axis. Once you trace the left half of the drawing, you can use the Mirror tool to create that sketch geometry flipped over on the right axis.
After selecting and mirroring the left-half geometry we traced manually using the Circle, Line, and Fit-Point Spline tools, we now have a full trace of our drawing. Now it's time to create a solid three-dimensional object from this sketch geometry, using the Extrude tool.
Extrude the sketch geometry: Select the Extrude tool, and click all of the closed sketch faces that you want to give a thickness to, and type in the thickness you want them to be. We want this part to be 10mm thick, so we type in 10mm into the Extrude tool box after selecting the sketch faces, and this gives us our final 3D Model of our anchor.
Now you have completed the process of creating a 3D Model file from your sketch. We just need to save it off in the right format for 3D Printing.
Saving as an STL file: From the Bodies section in the model tree on the left of the design area, right-click the model body, and select Save as STL. Name your file, and click Save. Now you're ready to 3D Print this STL file.
Step 3: 3D Printing Your STL File
The hardest part is over -- once you have your STL file, getting a 3D Print is simple.
When you create a user account at Hollywood 3D Printing, you get 10% off your first online 3D Printing order. You also get free access to a suite of helpful online 3D tools.
On sign-in to your Hollywood 3D Printing user account, you're directed to a blank new quote which is ready for uploading your 3D Model files in STL, OBJ, STEP, or IGES file format. This is where we're going to be uploading the STL file created in the previous step of this guide.
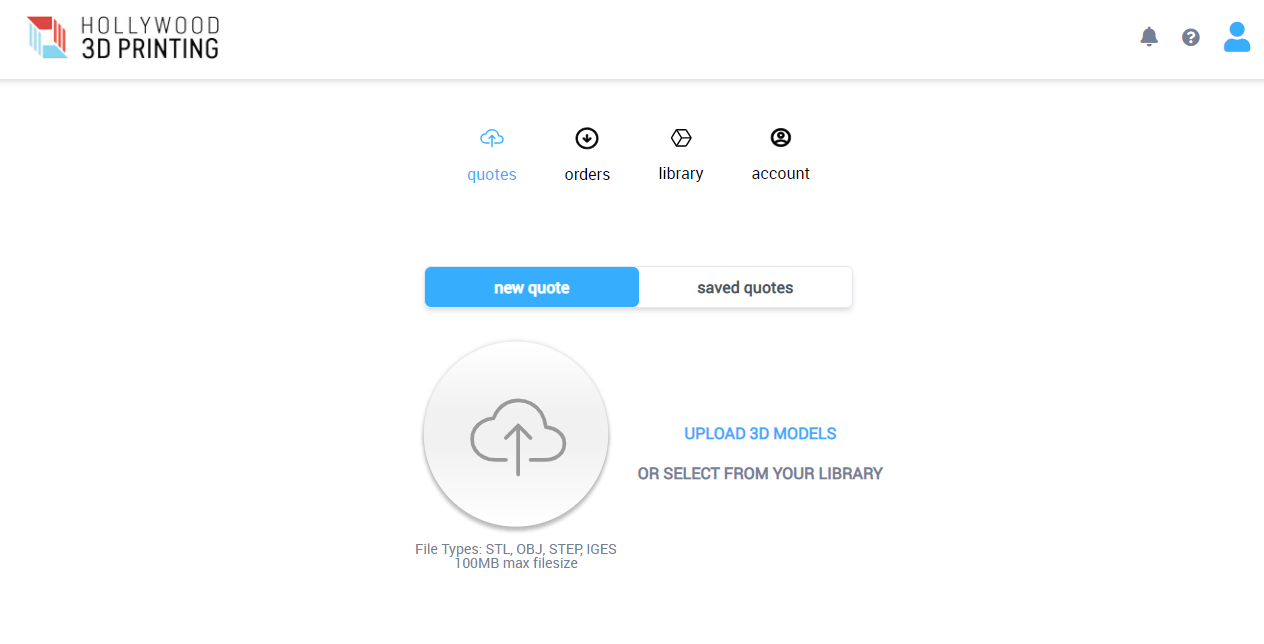
When you sign in to your user account, you're directed to a blank New Quote. This is where you can upload 3D Model files and get an automatic 3D Printing quote and order parts online.
To order a 3D Print of your 3D Model file, just drag+drop your STL file over the upload icon in this window, and it will appear as a new Line Item in your automatic online 3D Printing quote.
Once your 3D Model appears as a new line item in this 3D Printing quote, you can click the "Generate Price" button. This step is where our online 3D software analyzes your 3D Model file, and determines the size of your part, how long it takes to 3D Print, and the volume of material required by the part. Based on this information, you will see a quoted price to 3D Print your 3D Model.
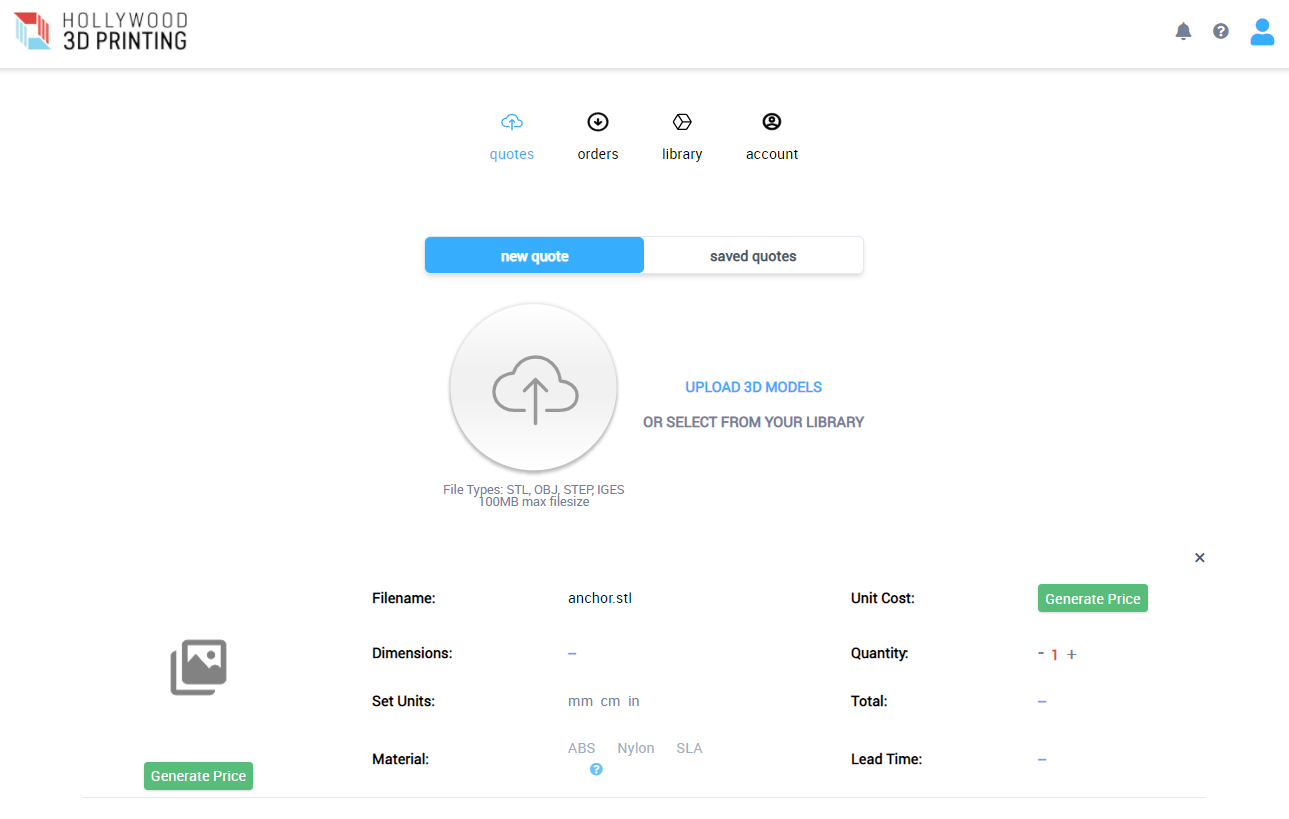
After adding a 3D Model file to your automatic quote, you will see a "Generate Price" button appear. Click this button, and our online 3D software will analyze your 3D Model file and generate a 3D Printing price.
Along with this pricing information will be the dimensional size of your 3D Model. If the default choice for the 3D Model dimension units is not right, you can change your units by clicking "mm", "cm", or "in" in the Set Units section, and you will see your dimensions update.
In addition to changing the dimension units, you can select your build material option, and change the quantity
of your order if you're looking for more just one part.

Upon generating a price, your 3D Printing quote will include a thumbnail image of your part, and a link to view your 3D Model in the online 3D viewer software.
From here, you are ready to proceed to checkout, and your 3D Printed part will ship to you within a matter of days.
Thanks for reading this guide! If you got this far, hopefully you now understand how to go from a simple 2D sketch to a finished 3D Printed part. We look forward to becoming your trusted 3D Printing partner.
Get Inspired
Browse through hundreds of examples of our 3D printing, 3D design, and custom fabricated builds.